
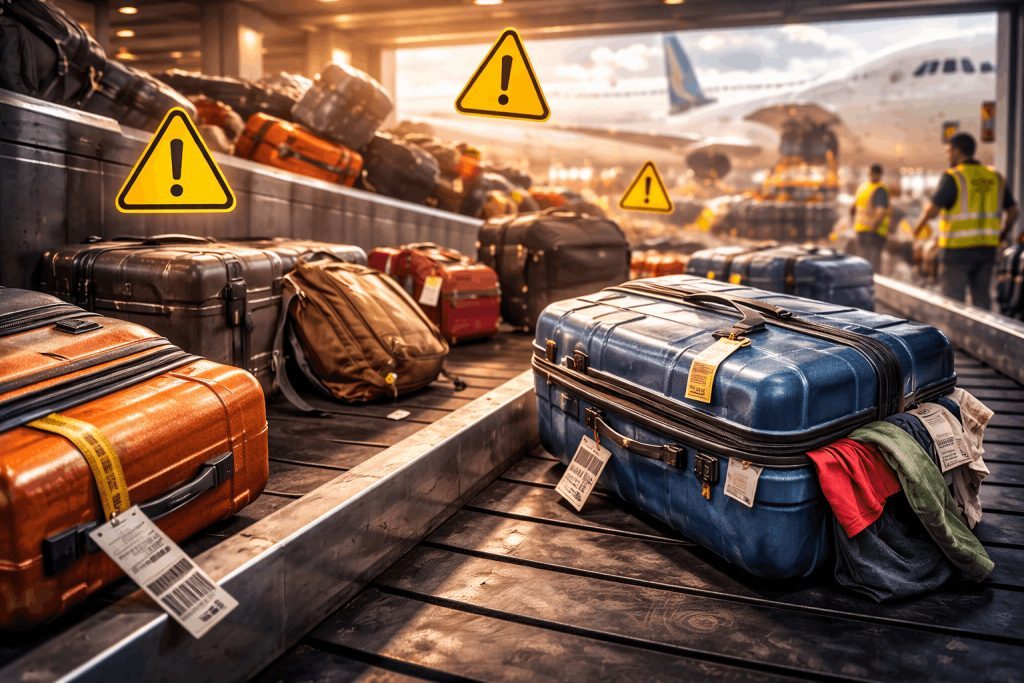
I’ve learned the hard way that the flight price you see online is only half the story. The real bill shows up later, in the form of baggage fees, missed connections, and that sinking feeling when your suitcase doesn’t appear on the carousel.
If you’re flying a simple out-and-back on one airline, baggage is boring. On a multi-airline, multi-city itinerary, baggage is a strategy game. Play it well and you save money, time, and stress. Play it badly and you pay twice, run through airports, and argue with agents about who lost your bag.
Let’s walk through the key decisions you need to make before you even zip your suitcase. Think of this as your personal multi airline baggage strategy for keeping costs down and bags moving with you.
1. One Ticket or Many? The Decision That Makes or Breaks Your Baggage Plan
This is the single biggest factor in whether your bags glide through to your final destination or become your problem at every connection.
Start with one simple question: Is my whole journey on one ticket (one booking reference/PNR), or did I stitch it together with separate bookings?
Here’s why it matters:
- Single ticket / one PNR
Your flights are part of one itinerary. According to multiple airline policies and guides like TravelClosely and Phong Nha Explorer:- You usually pay checked baggage fees once per direction, not per segment.
- Bags are typically tagged to your final destination.
- Airlines transfer your bag between themselves if they have interline agreements.
- Separate tickets
Each booking is treated as a separate trip.- You often have to collect and recheck your bag between flights.
- You can be charged baggage fees again on the next ticket.
- If you miss the second flight because of delays, the second airline usually owes you nothing.
Third-party sites make this confusing. They sometimes show a neat-looking itinerary that is actually a bundle of separate tickets. That’s how people end up paying baggage fees twice, sprinting through unfamiliar airports, and discovering too late that their baggage allowance on different airlines in the same trip doesn’t line up.
My rule: If I’m checking a bag and the itinerary is even slightly complex, I strongly prefer a single ticket. If I must use separate tickets, I assume:
- I’ll pay baggage fees for each ticket.
- I’ll need extra connection time to reclaim and recheck bags.
- Any missed connection is on me.
Before you book, look for one confirmation number, one PNR, and one set of baggage rules. If you see multiple booking references, treat it as multiple trips, no matter how nicely the website packages it. That mindset alone can help you avoid baggage fee pileups on complex itineraries.
2. Interline Agreements and Alliances: Who Will Actually Touch Your Bag?
Even on one ticket, your bag doesn’t magically teleport between airlines. It moves because airlines have agreements to handle each other’s baggage. That’s where interline agreements come in.
In plain language, an interline agreement means:
- Airlines can sell tickets that include each other’s flights.
- They can issue boarding passes for the whole journey.
- They can transfer checked bags between each other.
Sites like Hands Off My Suitcase explain this well: interline is the basic level of cooperation. Above that you have codeshares and joint ventures, but for baggage, interline is the key.
Here’s the catch: not all airlines interline with each other. Many low-cost carriers don’t. Even big airlines limit through-checking on separate tickets. For example, American Airlines clearly states in its through-checked bag policy that it will not through-check bags to non-oneworld airlines on separate tickets.
So what do you do with this?
- Check who’s actually operating each flight.
Alliances like Star Alliance, oneworld, and SkyTeam are a good sign, but not a guarantee. Their alliance baggage rules often help, but they don’t override every situation. - Before you buy, ask:
If I book this as one ticket, will my bag be checked through to the final destination?
This matters even more on mixed airline itineraries. - At check-in, explicitly say:
Please tag my bag to [final city code].
Then check the tag.
If the agent says they can’t through-check, don’t argue blindly. Ask why. No interline agreement? Separate tickets? Customs rules? Once you know the reason, you can adjust your plan instead of being surprised at the transfer airport. This is where a quick codeshare baggage policy comparison can save you from a nasty surprise mid-trip.

3. The Most Restrictive Segment: Why One Short Flight Can Blow Up Your Whole Plan
Multi-city and multi-airline trips are rarely symmetrical. You might have a long-haul on a wide-body aircraft, then a short hop on a tiny regional jet. Or a generous full-service airline followed by a bare-bones low-cost carrier.
Here’s the uncomfortable truth: your baggage strategy is only as strong as your most restrictive segment.
From sources like BookFlightTickets and LuggageToShip, a few patterns show up:
- Regional jets and small planes often have tighter size and weight limits.
- Low-cost carriers may charge for every checked bag and even for larger carry-ons.
- Basic economy fares can strip away checked baggage entirely.
What this means in practice:
- If your long-haul airline allows 2 x 23 kg checked bags, but your final regional leg allows only 1 bag or charges heavily for the second, that last leg sets the tone.
- If one segment is on a low-cost carrier, assume you’ll pay separately for bags on that segment, even if the rest of the trip is generous.
- If one flight has a tiny overhead bin, you may be forced to gate-check your carry-on, which can be a problem if it contains valuables or batteries.
My approach:
- List every segment of the trip.
- Check baggage rules for each one (checked and carry-on).
- Plan my packing around the strictest rule I find.
It’s not fun to downsize your suitcase because of one 45-minute flight on a small plane. But it’s still better than paying surprise overweight fees, repacking at the airport, or discovering that your baggage cost breakdown on a multi segment flight is way higher than expected.
If you want the cheapest way to check bags on multi airline routes, this is it: pack for the most restrictive segment and let the more generous flights feel like a bonus.
4. Customs, Immigration, and the Hidden Recheck Trap
Even when airlines are perfectly coordinated, border rules can override everything. This is where many travelers get caught.
In countries like the U.S. and Canada, you often have to:
- Collect your checked bag at the first point of entry.
- Clear immigration and customs.
- Recheck your bag for the onward flight, even if it’s on the same ticket.
Guides like GenBuy and others confirm this: customs rules trump interline agreements. Your bag may be tagged to the final destination, but you still have to physically handle it mid-journey.
Why this matters for your strategy:
- Connection time: You need more time at your first entry point than a normal domestic connection. Think 2–3 hours for international arrivals, especially if you’re on separate tickets.
- Responsibility: If you miss your onward flight because you were stuck in immigration or baggage recheck, the airline’s willingness to help depends heavily on whether it’s one ticket or two.
- Fees: On separate tickets, you may pay baggage fees again when you recheck.
So when you see an itinerary with a 1-hour connection after an international arrival, ask yourself: Will I have to collect and recheck my bag here?
If the answer is yes, that connection is probably too tight.
Personally, I treat any first point of entry with baggage recheck as a risk zone. I build in extra time, keep essentials in my carry-on, and assume that if something goes wrong, I’ll need to be flexible. It’s one of the simplest ways to reduce the lost luggage risk on multi carrier flights.

5. Fee Strategy: How to Stop Baggage Costs from Snowballing
Baggage fees are not random. They follow patterns. Once you understand those patterns, you can decide where to pay, where to avoid, and where to rethink your whole packing plan.
From airline examples and fee breakdowns in sources like TravelClosely and National Traveller, a few rules emerge:
- On a single ticket, you usually pay checked bag fees once per direction, even if you have multiple connections.
- On separate tickets, each ticket can charge its own baggage fee.
- Adding bags later (after booking, or at the airport) is often more expensive than choosing a fare that includes bags upfront.
Here’s how I approach fees on complex itineraries:
- Price the whole journey, not just the fare.
I add up:- Base fare.
- Checked bag fees for each airline.
- Overweight/oversize risk if I’m close to the limit.
- Be wary of basic economy and ultra-low-cost carriers mid-journey.
They can look cheap but punish you with baggage fees, especially if you’re connecting from a full-service airline that already gave you a generous allowance. - Pay for bags in advance when possible.
Most airlines let you add baggage via their website or app. It’s usually cheaper than paying at the airport and gives you clarity before you pack. - Check who you should pay.
On multi-airline single tickets, you typically pay baggage fees to the first operating carrier. Paying the wrong airline can trigger duplicate charges or confusion.
If the math starts to look ugly, step back and ask: Is this still the best way to move my stuff?
Sometimes the answer is no, and that’s your cue to rethink your checked baggage rules across different airlines or switch to a carry on only strategy for multi airline trips.
6. Shipping vs Checking: When to Take Your Bag Out of the Airline Equation
There’s a point where airline baggage rules become so messy that the simplest move is to step outside the system. That’s where luggage shipping comes in.
Services like those described on LuggageToShip let you send your suitcase door-to-door, independent of your flights. It’s not always cheaper, but in some scenarios it makes a lot of sense:
- You’re on a multi-city trip with several airlines and fare types.
- You’re carrying specialty gear (sports equipment, bulky items) that airlines love to surcharge.
- You’re facing multiple rechecks due to customs or separate tickets.
When I compare shipping vs checking, I look at:
- Total airline baggage fees (including overweight/oversize).
- Risk of mishandling on complex itineraries.
- Convenience: not dragging a huge suitcase through multiple airports and cities.
- Timing: shipping requires lead time; I check delivery windows carefully.
Shipping isn’t a magic bullet. You still need a solid carry-on strategy for essentials and a backup plan if a shipment is delayed. But for high-complexity trips, it can turn a chaotic baggage situation into something predictable and take your bag completely out of the through checked baggage on separate tickets debate.

7. Practical Habits That Actually Prevent Lost or Mishandled Bags
Even with perfect planning, things can go wrong. The goal isn’t to eliminate all risk; it’s to stack the odds in your favor and make recovery easier if something does happen.
From practical guides like GenBuy, here are habits I’ve adopted:
- Check the tag every time.
At check-in, I confirm the airport code on the baggage tag matches my final destination (or the correct transfer point if customs requires a recheck). - Keep all receipts and boarding passes.
I don’t throw away baggage receipts until I’m reunited with my bag at the final stop. - Photograph everything.
I take photos of my suitcase, the baggage tag, and sometimes even the contents. It helps with claims if something goes missing. - Make the bag identifiable.
A simple strap, sticker, or bright tag makes it easier to spot and harder for someone else to walk off with by mistake. - Put contact details inside and outside.
If the outer tag is torn off, there’s still a way for the airline to identify the owner. - Keep valuables and essentials in your carry-on.
Documents, medication, electronics, and at least one change of clothes stay with me.
One more habit: I assume that if a bag can be misrouted on a complex itinerary, it might be. That mindset makes me more careful at every handoff and reduces the stress if something does go wrong.
8. Putting It All Together: Your Personal Baggage Playbook
Multi-airline, multi-city trips don’t have to be a baggage nightmare. But they do require you to think a few moves ahead.
Here’s a simple checklist you can adapt for your next trip:
- Before booking
- Decide: one ticket or separate tickets? If separate, accept the baggage risks.
- Check which airlines are involved and whether they interline.
- Identify the most restrictive segment and plan around it.
- Compare total cost including baggage, not just the base fare.
- Consider alliance options (Star Alliance, oneworld, SkyTeam) if you want more predictable alliance baggage rules.
- After booking
- Confirm baggage rules for each segment (checked and carry-on).
- Add bags in advance via airline websites/apps if needed.
- Decide whether to ship any luggage instead of checking it.
- At the airport
- Ask agents to tag bags to the correct final destination.
- Verify tags and keep receipts.
- Allow extra time where customs or recheck is required.
- On the trip
- Keep essentials in your carry-on.
- Document everything if something goes wrong.
- Stay flexible; sometimes the smartest move is to repack or ship mid-trip.
The point isn’t to memorize every airline’s policy. It’s to understand the logic behind how baggage works on complex itineraries, so you can make smarter choices and avoid common mixed airline itinerary baggage mistakes.
Next time you’re tempted by a cheap multi-airline route, pause and ask yourself: What’s my baggage strategy for this?
If you can answer that clearly, you’re already ahead of most travelers at the check-in line.