

I love using public transit when I travel. It feels local, it’s usually cheaper than taxis, and it’s often faster than sitting in traffic. But I’ve also watched a “cheap” transit day quietly turn into a money leak because of fare rules I didn’t fully understand.
If you’ve ever stared at a ticket machine thinking, Why is this so complicated?
you’re not alone. Fare systems are built to juggle revenue, crowding, and fairness. They’re not built to make life easy for visitors.
Let’s walk through the main ways transit fare rules can wreck your travel budget – and how to plan around them so you actually get the savings that public transport promises.
1. Flat Fare vs. Zones vs. Distance: Are You on the Wrong System for Your Trip?
The first trap is invisible: the type of fare system a city uses. Most networks fall into three buckets:
- Flat fare: One price, any distance (common on buses).
- Zone-based: The city is sliced into fare zones; crossing boundaries costs more.
- Distance-based: You pay for how far you actually travel.
Each one rewards a different kind of rider. If you don’t match your behavior to the system, you overpay.
On a flat-fare system, long rides are a bargain and short hops are expensive. On zone or distance-based transit pricing, the opposite can be true: that “quick” cross-border ride can cost more than a long journey that stays inside one zone. Research on fare policy shows that these structures are deliberate tools to shape ridership and revenue, not just arbitrary quirks (source).
How this blows your budget:
- You take lots of short rides on a flat-fare system instead of walking 1–2 stops.
- You cross fare zones without realizing it and pay a premium for tiny distance changes.
- You assume “one city, one price” and get hit with distance surcharges on regional or metro trains.
How I plan around it:
- Look up the fare structure before you land. I literally Google:
city name transit fare zones
ormetro and train fare rules for tourists
and skim the official site. - Map your accommodation against the zones. If a hotel is just over a zone boundary, that “cheap” room can cost you extra every single day.
- Cluster your long trips (airport, day trips) on the same day if there are day passes, caps, or special tickets that make them cheaper together.
Once you understand whether you’re dealing with flat fares, zones, or distance-based transit pricing, you can start playing the game instead of being played by it.
2. Peak vs. Off-Peak Pricing: Are You Paying Rush-Hour Tax for No Reason?
Many systems quietly charge more during rush hour. Sometimes it’s obvious (different ticket types). Sometimes it’s buried in the fine print or only shows up in the app at checkout.
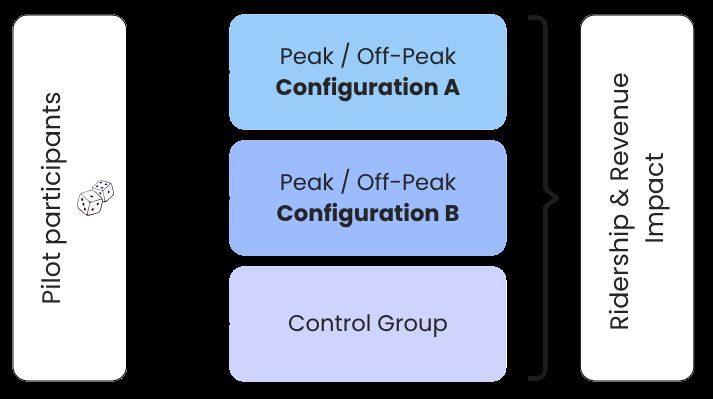
Transit agencies use peak/off-peak pricing to spread demand. Cheaper off-peak fares nudge flexible riders away from the crush, so they don’t have to buy more trains and buses just to cover a few busy hours (source).
How this blows your budget:
- You pay peak fares even though you’re a tourist with flexible time.
- You buy an off-peak ticket and accidentally board a peak train, then get hit with a surcharge (the New York area railroads do this – off-peak tickets used on peak trains cost extra, and you don’t get a refund if you overpay with a peak ticket later source).
- You plan a daily commute-style itinerary (9 a.m. museum, 5 p.m. dinner) that keeps you in the most expensive windows.
How I plan around it:
- Shift non-essential trips out of peak. If a city defines peak as 7–9 a.m. and 4–7 p.m., I’ll aim for 9:30 a.m. and after 7 p.m. when possible.
- Check the exact rules. Some systems define peak by departure time, others by entry gate time. That matters if you’re cutting it close.
- Use digital pay-as-you-go where available. Apps like FAIRTIQ or local equivalents automatically apply off-peak discounts so you don’t have to memorize time bands.
Ask yourself: Do I really need to be on that 8:30 a.m. train?
If not, you can literally buy back your time with cheaper fares and less crowding.
3. Passes, Caps, and Pay-Per-Ride: Are You Choosing the Wrong Deal?
This is where most people quietly lose money on public transport hidden costs. In most cities you’ll see three main options:
- Pay-per-ride (single tickets or tap-in/tap-out).
- Time-based passes (day, week, month).
- Fare capping (you pay per ride until you hit a daily/weekly cap, then the rest is free).
Research on low-income riders found that about 30% of people paying per trip would have saved money with a pass (MIT study). That’s not a small mistake. That’s structural.
How this blows your budget:
- You buy single tickets because a pass feels “expensive,” then end up spending more over a few days.
- You buy a weekly pass for a 3-day trip and never come close to breaking even.
- You don’t realize the system has fare capping, so you stress about which ticket to buy instead of just tapping and letting the system optimize for you.
How I plan around it (I do this math almost every trip):
- Estimate your rides. Be honest. Airport, hotel, 2–4 rides per day, maybe a day trip.
- Calculate the break-even point.
Example: Single ride is $2.50, day pass is $7.50. If you’ll ride 3+ times that day, the pass wins. - Check for caps. If the system caps at, say, 3 rides per day, you don’t need a day pass at all – just tap and let the cap kick in.
On some commuter rail systems, like LIRR and Metro-North in New York, monthly tickets are the best deal if you ride three or more days a week, and they even allow one extra ride at the start of the next month (source). That’s the kind of detail that matters if you’re doing a longer stay or remote work trip and comparing a day pass vs pay-per-ride cost.
Ask yourself: Am I avoiding a pass because it feels big, or because the math actually doesn’t work?
Those are not the same thing.
4. Transfers, Zones, and “Intermediate” Tickets: Are You Paying Twice for One Trip?
Transfers are where fare rules get sneaky. Some systems let you transfer for free within a time window. Others charge a small fee. Some treat a bus-to-metro transfer as one trip; others treat it as two separate fares.
Regional rail adds another layer. For example, on Metro-North and LIRR, transfers in the same direction on a single trip don’t require extra payment – but only if you’ve bought the right through-ticket between the correct zones (source).
How this blows your budget:
- You buy separate tickets for each leg instead of a single through-ticket.
- You don’t realize your ticket is only valid within certain zones, so a short extension ride costs disproportionately more.
- You miss the transfer time window and pay full fare again.
How I plan around it:
- Always search for a through-ticket on regional rail. Look for options like
Combo
,intermediate
, orzone-to-zone
tickets. - Check the transfer window. Is it 60 minutes? 90? 2 hours? That affects how leisurely you can be between stops.
- Use the official app if there is one. Many apps auto-handle transfers and show you whether you’re still within the valid time.
One mental trick I use: I think in journeys, not rides. If I’m going from my hotel to a museum that requires a bus and a metro, I ask: What’s the cheapest way to buy this whole journey?
That question alone can save you from paying twice and avoid common transit fare zones mistakes.
5. Hidden Fees and Payment Traps: Are You Paying More Just to Pay?
Even if you’ve mastered the fare rules, you can still lose money on how you pay. A lot of the hidden cost of transit doesn’t come from the agency; it comes from the payment ecosystem around it.
Common culprits (source):
- Reload fees at convenience stores or third-party kiosks.
- Processing fees on certain mobile wallets or cash top-up services.
- Maintenance or inactivity fees on prepaid cards you use just for travel.
How this blows your budget:
- You reload small amounts frequently and pay a fee each time.
- You use a prepaid card with a monthly fee just for a short trip.
- You rely on a third-party app instead of the official one and pay a “convenience” surcharge.
How I plan around it:
- Use official channels (agency app, website, station machines) whenever possible. They usually don’t add reload fees.
- Tap your contactless card or phone directly if the system supports it. That bypasses separate fare cards and reload fees entirely.
- Load larger amounts less often if you must use a fee-based top-up service. One $20 reload with a $1 fee is better than four $5 reloads with $1 each.
- Check your card’s terms before you travel. Look for foreign transaction fees, ATM fees, and inactivity fees.
If you’re a numbers person, track a week of transit spending in a budgeting app. You’ll often see small, repeat fees that are easy to eliminate once you notice them.
6. When “Cheap Transit” Isn’t Actually Cheap: Time, Access, and Health
There’s another layer that doesn’t show up on your bank statement but absolutely affects your budget: time and access.
Studies on low-income riders show that when fares drop by 50%, people take about 27% more trips, especially to healthcare appointments they were skipping before (MIT study). That’s not just about saving a few dollars. That’s about whether you can afford to go to the doctor.

As a traveler, you’re not dealing with the same long-term constraints, but the logic is similar:
- If transit is too expensive or too slow, you’ll default to taxis or rideshares “just this once.” Those “once” decisions add up fast.
- If your hotel is cheap but far from frequent transit, you’ll pay in time and rideshare costs.
- If you misjudge the system and miss trains or buses, you pay with both money and lost experiences.
How I plan around it:
- Price the whole package: hotel + transit + occasional rideshares. A slightly more expensive, central hotel can be cheaper overall when you factor in public transport costs.
- Check service frequency, not just routes. A bus every 10 minutes is a different life than a bus every 40.
- Build buffer time into airport and intercity connections so you’re not forced into last-minute taxis.
Ask yourself: Is this transit option actually saving me money once I factor in time, stress, and backup rides?
Sometimes the answer is yes. Sometimes it’s a polite no.
7. A Simple Pre-Trip Checklist to Keep Your Transit Budget Under Control
To pull this together, here’s the quick checklist I run through before I rely on transit in a new city. It’s my shortcut for avoiding transit overcharges and fare rule traps for travelers:
- Identify the fare structure
Flat, zone, or distance-based? Any special airport or regional surcharges? How do the city’s transit pricing strategies work in practice? - Check peak/off-peak rules
When is peak? How much more does it cost? Are there off-peak discounts you can use? - Compare passes vs. pay-per-ride
Estimate your rides. Find the break-even point. Check for fare capping vs single tickets so you’re not overpaying. - Understand transfers
Is there a time window? Are bus–metro transfers free or discounted? Are there through-tickets for regional trips so you don’t pay twice for one journey? - Choose your payment method
Official app, contactless card, or local card? Any reload, foreign transaction, or convenience fees? - Map your accommodation to transit
Which zone? How frequent is service? What’s the real daily cost of getting in and out, and can you plan routes around fare zones to keep costs down?
Public transit can save you thousands compared with owning or renting a car – some estimates put the annual savings at over $9,000 for regular users (source). But that’s only true if you understand the rules of the game.
The next time you land in a new city, don’t just ask, How do I get into town?
Ask, How does this system want me to pay – and how can I bend that to my advantage?
That’s where the real savings start.